Rainbow Crayons
Winter months can be rough. It is hard to keep multiple children (or even one!) happy when they can't just go outside and run all of their energy off. So I have collected a few ideas that I will post over the next few weeks to keep everyone entertained, sane, and won't break your budget.

For years I have kept broken crayon pieces (because I can't throw anything away) thinking there's got to be something I can do with them one day. While I was cleaning out/organizing our school cabinet a couple of weeks ago I found my tub of broken crayon pieces and decided it was time to come up with a project for them or time to toss them. And that's where this idea came from.
After a little internet research I learned that most people call the results of this project Rainbow Crayons and we happily decided to give it a try!


(Note: Think about the shape and size carefully. If you have older kids they might want more pen-like shapes to be precise with their coloring creations versus younger ones who may not care about that as much and might prefer fun shapes like my kiddos did.)
⇢ You'll likely need something to grease the muffin tins with. I used a light coating of coconut oil.
⇢ You'll need a disposable fork or toothpick or something that you can toss when you're finished to help level out the crayons as they cook.


I would guess it took about 45 minutes for my crayons to melt enough for me to feel they were ready to come out. Don't wait until they're liquid or else you'll end up with a big brown crayon! Pull them out when about half of the crayons are melted and the other half are super soft. This is when you use your disposable fork or toothpick to push down any pieces that are sticking up and make sure it's mostly flush on what will be either the top or bottom of your crayon.


Tips for making your own Rainbow Crayons:
⇢ Don't grease the tins too heavily. It'll create a weird layer on the crayons you'll have to 'color' off. Just add a little to ensure they don't get stuck.
⇢ Don't mix too much white in. We avoided white entirely. Once we have a few more white crayons in our broken bucket I plan to add some gold and silver and make a light colored rainbow crayon for coloring on black pages, but until then I didn't add any white to ours.
⇢ Don't add too much brown! If they mix too much the whole mixture turns a brown-like color anyways, so be mindful of brown pieces.
⇢Teach them at the same time! We did two multicolored crayons, two cool colored crayons, and two warm colored crayons. While we were breaking up the pieces and deciding which place each piece needed to go, I explained cool colors and warm colors to my 5 year old and let him decide which one each color should go in. This also makes picture coloring easier. Once ours were done we drew a landscape picture and used the warm colors for the sun and flowers and the cool colors for the ocean, ground, and birds flying in the sky.


⇢ Think about what your kids will likely color when mixing colors. Does one kid mostly use black and red (yes!), consider making a strictly black and red crayon. Or do they draw a lot of trees? Maybe make one that is more earthy and green colors. Just think it through so the color mixtures will turn out fun and usable for your kids.
⇢ Don't stress about it! Your kids will be excited no matter what and then they'll probably color for 15 minutes before moving on. Just have fun with it!
Consider taking a picture and sending it to us! We'd love to see how your Rainbow Crayons come out! Let us know how your experience was in the comments below! Happy melting!

For years I have kept broken crayon pieces (because I can't throw anything away) thinking there's got to be something I can do with them one day. While I was cleaning out/organizing our school cabinet a couple of weeks ago I found my tub of broken crayon pieces and decided it was time to come up with a project for them or time to toss them. And that's where this idea came from.
After a little internet research I learned that most people call the results of this project Rainbow Crayons and we happily decided to give it a try!

Step One: Collecting the Crayons
Keep any kind of crayon. When you go to a restaurant and your kids come home with the same red, green, blue, and yellow knock-off crayon brand, toss them in the bucket with the broken pieces. I'm too practical to buy crayons with the intention of breaking them up but I will happily use broken pieces and knock-off crayons that likely no one will use anyway.
Step Two: Collect The Following
⇢ You'll need something to melt the crayons in. I chose a cheap silicone muffin pan I had in the kid's play drawer in my kitchen. I saw people online used regular muffin tins but I didn't want to use the ones we eat with for crayons and I didn't know if they might be hard to get out of the metal ones. I was happy with my silicone selection because it was easy to just pop them out at the end.(Note: Think about the shape and size carefully. If you have older kids they might want more pen-like shapes to be precise with their coloring creations versus younger ones who may not care about that as much and might prefer fun shapes like my kiddos did.)
⇢ You'll likely need something to grease the muffin tins with. I used a light coating of coconut oil.
⇢ You'll need a disposable fork or toothpick or something that you can toss when you're finished to help level out the crayons as they cook.


Step Three: Peeling the Labels!
Think about tearing off the labels as you collect them or give yourself extra time to remove them... I underestimated the amount of time and effort it would take to tear off all the labels and almost lost my 5 year old's interest in the process. Not to mention we used up all of my 2 year old's nap time and then I had to entertain him while trying to finish this project. Either pop in a movie and have a peeling contest/party or peel them ahead of time, but know that it'll take a little while. (Don't do your nails right before either! 😬)
Step Four: Break Them Up!
Break them into whatever size pieces you desire based off of your cooking pan situation and how blended you want the colors to be. If you break your crayons up into tiny pieces I would advise you don't allow them to melt quite as much as you would if you do larger pieces to avoid it mixing too much and turning out mostly brown.

Step Five: Bake It Up!
I turned my oven as low as it would go (170°F) and checked on them often. (If using silicone make sure you have a baking sheet underneath to make it easy to remove from the oven or flip around for even melting.)
I would guess it took about 45 minutes for my crayons to melt enough for me to feel they were ready to come out. Don't wait until they're liquid or else you'll end up with a big brown crayon! Pull them out when about half of the crayons are melted and the other half are super soft. This is when you use your disposable fork or toothpick to push down any pieces that are sticking up and make sure it's mostly flush on what will be either the top or bottom of your crayon.

Step Six: Let Them Cool
I pulled mine out of the oven and let them cool for a few minutes. Since silicone doesn't really get all that hot, after a few minutes I felt comfortable sticking them in the fridge to speed along the cooling process. After about 20 min in the fridge they were ready to be pulled out and colored with!


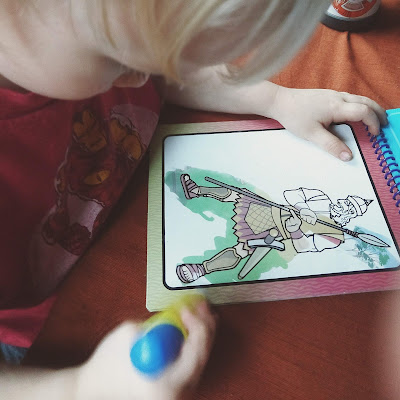
Step Seven: Have Fun!
Let them color and maybe consider joining them! Have some fun!Tips for making your own Rainbow Crayons:
⇢ Don't grease the tins too heavily. It'll create a weird layer on the crayons you'll have to 'color' off. Just add a little to ensure they don't get stuck.
⇢ Don't mix too much white in. We avoided white entirely. Once we have a few more white crayons in our broken bucket I plan to add some gold and silver and make a light colored rainbow crayon for coloring on black pages, but until then I didn't add any white to ours.
⇢ Don't add too much brown! If they mix too much the whole mixture turns a brown-like color anyways, so be mindful of brown pieces.
⇢Teach them at the same time! We did two multicolored crayons, two cool colored crayons, and two warm colored crayons. While we were breaking up the pieces and deciding which place each piece needed to go, I explained cool colors and warm colors to my 5 year old and let him decide which one each color should go in. This also makes picture coloring easier. Once ours were done we drew a landscape picture and used the warm colors for the sun and flowers and the cool colors for the ocean, ground, and birds flying in the sky.


⇢ Think about what your kids will likely color when mixing colors. Does one kid mostly use black and red (yes!), consider making a strictly black and red crayon. Or do they draw a lot of trees? Maybe make one that is more earthy and green colors. Just think it through so the color mixtures will turn out fun and usable for your kids.
⇢ Don't stress about it! Your kids will be excited no matter what and then they'll probably color for 15 minutes before moving on. Just have fun with it!
Consider taking a picture and sending it to us! We'd love to see how your Rainbow Crayons come out! Let us know how your experience was in the comments below! Happy melting!
Comments
Post a Comment